So you've got the 3DS system update and want to know exactly what's new? We've got you covered.
Here you'll find a regularly updated account of how to get the most from your system's new features. If you have any questions, use the Contact form and we'll do our best to address them.
Page 1: 3D Video Recording
Page 2: StreetPass Mii Plaza
Page 3: Nintendo eShop updates
Page 4: 3DS System Transfer Tool
Page 5: Your 3DS Update Questions Answered
How to Get the Update
How to Update your Nintendo 3DS explains the whole process.
3D Video Recording
One of the biggest updates is the ability to record 3D video on your 3DS. There are a few more options than just point-and-shoot though: here's what you can do and how.
Open the 3DS camera function
You'll see along the top of the touch screen your camera icon is joined by a video camera icon; unsurprisingly this opens up the world of video recording.
Select the video camera icon and use L or R to start shooting. You can record up to ten minutes of 3D video at any one time — the total amount of video you can shoot is determined by the amount of free space on the SD memory card.
Your videos are saved in .AVI format which means you can view them on a computer — in 2D of course.
Let's have some fun
Like the camera function, your 3D video isn't just limited to point and shoot. Tap the red lever at the bottom: this opens up the following extra menu options:
Camera Mode
Normal just uses default settings and is ideal for video in bright conditions. If things are a little darker, use the Low-Light setting.
Manual Controls
Want more control over your shooting? The Manual Controls option is for you, letting you change a number of settings:
Film: Normal, B/W (black & white), Sepia Negative, Solarise.
Sharpness, Contrast, Brightness
Shooting Stop-Motion
As well as constant video you can also try out the Trick Shot modes that let you create stop motion video and other quirky effects. Here's how they work:
Interval Shot
This mode takes a photo at specified intervals: 0.5 seconds, 2 seconds, 5, 15 and 30 seconds. No need to hold the shoot button down: just line up your shot in time. An on-screen countdown shows when your next shot is about to be taken, so be quick! You can use this feature to create impressive time-lapse videos.
Frame Pick
This is the more traditional stop-motion method, with one shot for every shutter click. Look closely and you'll notice a slight ghosting of your previous frame, letting you line up your shots precisely.
Clip Link
Fairly self-explanatory really: link regular video clips together.
Video Size
Some of you may be wondering how big these videos can get so you can decide whether or not to buy a new SD card. While the resolution of these videos isn't likely to cause you any serious problems right out the gate — 480 x 240 isn't enormous — if you plan on shooting long movies a larger SD card might be a good purchase.
1 minute of 3D video recording takes up around 28MB of space on your SD card.
If you plan on taking a lot of long videos, it might be wise to get a spare SD card: if you take a great video and then discover there's no space for it to save, you're plum out of luck.
Q: Does this mean I can play videos on my 3DS now?
A: Yes you can, but it can be a bit of a fiddly process.
Your 3DS will play .AVI files only that meet the following specifications:
Filetype: .AVI
Encoding: MJPEG
Resolution: 480 x 240
Frames per second: 20
Aspect ratio: 4:3
You will probably need to use a video converter programme to get your video to meet these requirements. Once done, the file must be saved in the SD Card's DCIM folder using the name HNI_00XX.AVI where XX is any number.
Coming up: StreetPass Mii Plaza, eShop and System Transfer


Comments 119
Finally a Street Pass map! That's a great move right there. I always thought it was stupid not to be able to sort your Miiss by place at all.
This all sounds really, really cool.
Nice guide. The links in the upper part of the page are broken by the way (faq instead of guide).
If you try to buy something in the eshop and don't have enough you can now click "Add funds" and there'll be an option just to add the required amount!
I thought the new puzzles required 40 pieces to complete...or do some need 24 and some 40?
@guy_om Thanks for the spot!
@Martyn That option isn't available in the UK from what I can see but I'll look into it.
@NeonShell7 The DKCR puzzle needs 24; not sure about the Ocarina one.
I got a super mario 3d Land puzzle as a new one. might wanna add in that as information
Thanks for the guide guys~!
*Just thought I'd let you know. I got a Rhythm Heaven Fever puzzle grid.
Thanks for the guide, James!
Anybody else has difficulties starting Zen Pinball 3D after the update?
Thankyou for the guide James!
Just out of curiosity, I was under the false assumption that messaging would be available via this update. Is messaging still coming at all to the 3ds?
@James Weird. worked for me in Ireland. Had €1 in my balance, then went to Zen Pinball, tried to buy...then choosing the "add funds" option for my credit option allowed me to choose "required amount only"
It added just the €4 i needed from my credit card.
It has to be done when trying to buy a title you can't afford, the normal "add funds" option in the eshop doesn't work
@Dragonite64 Nintendo originally announced the messaging feature — Swapnote or Letterbox — is due out in December; it was never mentioned as part of this update. Bit longer to wait on that one I'm afraid!
@Martyn Fantastic, thanks for the extra information! I've incorporated this into the FAQ now
@James
Ahh, thankyou for your response!
@Ducutzu Got no problems with Zen Pinball.
Question: Could i transfer the purchases from two 3DS's to a single new 3DS? (obviously after waiting some time because of the time limit)
@James
New information: -The Slideshow icon is not available if you have no panels completed.
-Mexico is still limited to add funds on blocks of MX$ 60, 120, 250 and 600 (& no prepaid cards here) -The StreetPass Map icon wont show up if your 3DS is set to a region with no map available for this feature (like Mexico). It appeared when I changed my region to U.S. but even when the game saved after I checked the map, it didnt stay when I changed back to Mexico (Nintendo Video wont work if 3DS region isnt set to your actual location, and it would also affect your region in every online game)
Questions:
-Can you chose which games/data to transfer and which not? (the way transfering from DSi worked)
-Is ALL of the Activity log transfered? (Daily records AND Software library, including erased titles)
-Is Nintendo Wi-Fi Connection setup (DS games) transfered? is it deleted? or just stays on source?
@TWK Thanks for the update. I have deleted Zen Pinball (from the System Settings menu) and then redownloaded it from the shop. Now I get to the main menu in the game, but the game crashes while Loading the table.
I suspect it has to do with the fact that I have enabled the online leaderboards. Perhaps Nintendo changed some aspect of the way the console uses the Internet.
@ Ducutzu
Weird. mine works perfectly as well. But i only purchased it after the update....Maybe try deleting your save data (if that's an option)?
@James - The update added something else in the 3DS Camera photo browser. Now you can pull the circle pad down, and it will zoom out of the picture to show you more of it.
@Martyn I see what you're getting at but my gut instinct is no. However I can't test this out (I don't have three 3DSes!). If so, you'd need to daisy-chain them — transfer console #1 to #2, then #2 to #3, rather than #s 1 & 2 to #3, if that makes sense!
@7ATalavera Thanks for the information! I haven't actually tested out the transfer yet but I get the impression it's moving everything across — if anyone here has used the transfer, please tell us about it!
@Ducutzu Thanks!
@James: You're welcome! Oh I almost forgot, accomplishments for Mexico are only 77, so I would assume one of them has something to do with the StreetPass Map feature.
One question I'm surprised hasn't come up yet is can we transfer our Ambassador games? I want to upgrade to a red 3DS but not at the cost of my Ambassador games.
I have a couple of questions about the System Transfer. I've recently bought the Zelda 3DS and I want to sell my "old" red 3DS. But before that I want to transfer EVERYTHING.
Why do retail games on the eshop say "Not available in Nintendo eShop"?
For some reason I can't see the street pass map.
@jibberldd5 Because they're not available in the Nintendo eShop My guess is to make it clearer for browsers to know whether a game is download/retail.
@TourianTourist I can't answer those questions as I haven't tried the transfer but hopefully some of our users can answer them later. As far as I know it will transfer all your download games — DSiWare, 3DS download, Virtual Console — but the rest of the system-level stuff I'm not 100% sure on. As I say, hopefully a user can help out
@TourianTourist saw someone post this
"SO I HAVE DONE THE SYSTEM TRANSFER AND CAN CONFIRM THAT IT IS AN EXACT TRANSFER FROM YOUR OLD 3DS TO YOUR NEW ONE!
All of my saved data, 3DS games, 3D trailers, virtual console games, NES games, and settings are there, including all the Mii Plaza stuff. It's all unchaged. Most importantly, the little Ambassador Program video icon is still there which I assume means those of us who transfer will still get the GBA games when that starts rolling out.
It even has my icons on the main menu in the size and order I originally had them on.
It seems like it does like when you do a Time Machine backup for a Mac where it restores all your settings, only your old 3DS get wiped in the process instead. Otherwise, it seems identical so far."
so seems it should be fine!
Something I can confirm- If you have passed a "special Mii" and transferred them to the Mii Maker rather than leaving them in the Streetpass Plaza, you won't get the accomplishment for passing them. Sad times for me.
Also, The Streetpass Map didn't show up for me initially. My region was set to United States- California, and nothing showed up. I went into my system options and set it again to the same thing and the map showed up. It could be because a few months ago I had mine set to Canada? I have no idea...
Quick question - Do you need Internet to do the 3DS transfer? I plan on trading mine in when the redesign comes out, and unfortunately none of those stores have Wi-Fi. Last time I lost all my DSiWare when the system launched...
@BalrogtheMaster Yes you do — sorry!
A brilliant guide - many thanks!
Sorry to see there isn't an update to the Home screen though, I have quite a few gaps now as I've deleted some videos (and I want my 10 new Ambassador games to be all together). Hopefully the ability to move icons (or at least remove gaps) will come in a future update.
Yeah the 3DS update is pretty cool :3 imma try putting videos off my cpu on it.
@ThumperUK Hold your stylus on an icon on your Home Screen and you should "pick it up" ready to move it around
Hurray for being able to pay for games with exact change!
Just to let people know from what I tested the 3ds software transfers everything from games to game saves and ambassador status. The new 3ds had everything my old one had when transferred. It's great.
hell yes, exact dollar amounts! 'bout freakin' time, Nintendo! :3
Hey @James do you know if you can put videos longer than 10 minutes on your 3DS from you computer?
@Balrogthemaster
Only to start the transfer not during. At least I think.
@James
Man, that stinks! Oh well, maybe Ambassador 3DSs will be worth something one day.
here is my first 3DS video
http://www.youtube.com/watch?v=lwnbNrUPUxc
Great summary, guys. Nice work!
Just FYI "burst mode" is not the same as an interval timer, it's quite the opposite. A burst mode is when you want to take a "burst" of 3 or more shots in really quick succession, as in 3 per second. An interval timer is intended for time lapse so you can space out shots, i.e. only 1 shot every few seconds. Burst mode is a still camera thing while an interval timer is usually intended to be used for a time lapse movie (film or video). A 3DS burst mode would mean taking, say 5 still pictures at once in a second, but obviously the shutter is way too slow for that here.
just saying. I love that theres a time lapse option here.
Kind of hoping there is some basic video editing "game" on the way from someone.
@Ren I take your point, though the burst mode on my old camera worked like the one in the 3DS. I'll change that to clarify anyway.
The new Find Mii 2 game also has some additional options such as being
able to select different paths. You can also create teams of two that can do combo attacks.
The opponents in the game also now have magic abilities.
@Touriantourist yes to all of them
@Mario_Party_Fan_ also yes and nice choice on getting red:)
@James - I had no idea you could move the icons - many many thanks for that (I'd tried but hadn't left the cursor on the icon before!).
I'd been deleting DSi/3DS ware and re-downloading them just to fill up the empty spaces....I'm such a dunce!
Great, thanks!
This update really is something else. 3DS is becoming pretty cool.
I hope they add demos for 3rd party games like Ridge Racer and DOA. I'd like to try those games. But in truth I'm happy with any demo they add. Adding required funds is a God send. Thank You
What is Nintendo Zone from this update ?
Downloaded the update and it's awesome!
Mii Plaza has some nice new things like bigger puzzles, started the Pilotwings one.
QR scanning makes it really easy to get somewhere fast.
eShop became 2x better with the new add funds option, redeem code and demo download. I hope they'll use codes a lot and not just left it there for Kid Icarus. They should make more competitions like the Kid Icarus one. And I also hope that they start adding demos as soon as they can as some of people have waited for them for a long time. Wishing for better demos than the ones for Wii. Not all of them were bad but they were really short.
does it let you hold more than 300 play coins yet? i don't like the limiter...
I keep getting an error after a couple of minutes of downloading. Its happened 6 times now. Anyone else? Any advice
Yaaay, my YouTube channel will be happy that I can record videos once again.
Nice to see updates. Nothing fantastic, but its nice to have. :3
@chiptoon: leave it for a while and then come back to it. last night when it originally hit it kept giving me errors, but a couple hours later it went without a hitch. could be too many people trying to get it at once, haha :3
Puss in boots in 3D running around
I don't understand the video editing feature. You can choose in an out points so as to trim the clip (as well as speed changes, etc) but there's no option to actually save those changes. Seems kinda broken unless someone sees some other button I don't. There is only a 'cancel' button nothing to save changes with. Kinda kills any video editing that looks like it was there. anyone play with it yet.
Am loving update:)
Just speent 90 coins in mii plaza and unlocked several hats so cool!!!
But how do destroy black white sheild? i used black white spells and hiting it with miis wearin black white clothes but no luck?
Also checked eshop were demo thing? i no no demos but were is it located?
Great update, but I'm still disappointed that there is no gifting feature like on Wii and no local photo/video sharing like dsi. I hate all the steps forward and then Nintendo not bring over some of the little things that WERE great in previous generations.
@Tate24
I unlocked those too, but please refrain from spoilers. I'm sure a lot of us don't want to know what hats are in store. That's kinda the fun of Find Mii.
Am sorry.
But since i dont no anyone else who has 3DS i need share excitement with sumone:
I still have the original streetpass mini-games to complete before starting the new ones but this does seem like a really good update overall, especially the eshop updates.
Found a way to move videos from computer to 3DS. Smosh's Zelda Rap is even better when playing with it a little
What the heck is the point of Nintendo Zone? Sounds like you have to go to a special Nintendo Zone connection point (who knows where that is) just to do thing you could have done on the internet.
Wow. Puzzles? Quests? I had no idea there was so much to do with the StreetPass features. Too bad I live in the middle of nowhere and know absolutely no one else who owns a 3DS. Where do you find puzzles? What can you do with Play Coins and stuff anyway?
thanks blackdragon, will try to control my eagerness.
Almost the same as #68. ( @joevox316 ) my city is to small to have a lot of 3DS so I've hit only 2 true StreetPass the other 5 was from the Best Buy 3DS demo that is now block from this feature...
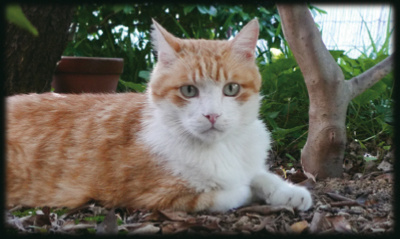
can anybody tell me if i can upload my cats in 3d in youtube? There is 3d tutorials but im not sure how to upload the videos of of my 3ds...
PS Vita will have to eat a lot of crow when it releases to catch up to the 3DS!
It is good to hear that you can keep save data when you transfer systems. I'm really gonna loathe those pink panels in the Puzzle Swap game. While I've already completed Find Mii quest, street passes are so rare, and often they don't contain any new panel pieces, so I only have unlocked/completed four of the original seven panels as of yet...
and why nobody is talking about NINTENDO ZONE? i didn´t had that until the update...
Nintendo Zone, for those asking, is effectively the same (but expanded) service as the DS download stations you find dotted around game stores. It's currently US-only as far as I can tell (I don't have it on my UK 3DS). I can't give more info than that, since I don't have the app to play around with, lol
Nintendo Zone must be like any other wifi signal and no with place restrictions. US-only sucks. It must be without download stations.
Ok I dont like the idea of saving your credit card info. I just recently had my XBL account hacked in which they stole my CC number cause it was saved on the XBL account. I liked that the 3DS didnt save my info so if it did get hacked in some way my number wasnt there. Is there a way to shut of the saving of the credit card info so you have to input it every time?
@Tasuki
It's completely optional. and it saves the data to your device i believe (encrypted using a password you choose). and you must enter your password to add funds from it.
Get your password wrong 3 times and it deletes all your credit card info.
@James How did you create the above web QR code?
EDIT: Nevermind, found it

@73
Nintendo Zone was already available at certain Best Buys, now it's just slightly improved. It mostly just contains advertisements and content you'd get on the eshop anyway, so I find it kinda pointless for now imo. There are approximately 28,000 "zones" in the US and Canada. Not very many.
Also about the whole fund thing. How big of a difference can you pay? If a game cost, say, $7.99 and I only have $0.01, will the service prompt me to just pay the difference?
@brandonbwii Yes, but I also remember being in Best Buy less than two weeks ago, and getting a 10% off coupon via their Nintendo Zone.
@brandonbwii & @shinesprite since you live in US you've got this to "work" in your Best Buys store but my Best Buy even cut the chance to get StreetPass and the 3DS there play only Star Fox 64 3DS and I can't even close it or try any other things on it... So most people like me will have this on there "3DS wall" for nothings...
@Late
How did you put videos from the computer to the 3DS? Can you put 3D videos in there? Will they work?
@brandonbwii When you try to buy it via a credit card you'll have an option to pay "Required Amount only" which will charge you $7.98
Nice guide guys, thanks for putting this together.
like the update just been playing with the motion stop making my stylus spin 360,apples hitting bananas.and sweets unwrapping and eating themselves like you do.be able to make some good vids with it
Cruses you guys beat me to getting cats in 3D. At least our streetpass group plan went off without any problems. Changed were we were, got puzzles from other places in Canada, changed back our region. Now we have 4 of the new puzzles so far, it is and was the prefect plan.
@James - the bird has new tips in the 3ds camera dealing with videos taking. Also the text is changed on the original Find Mii, it uses the new text
Quick! Record as much stuff in 3D as possible so we can put an end to the annoying "I bet you've never seen THIS in 3D!" part of the Nintendo Show 3D!
@James How does the Spotpass Mii Plaza function works? and also, how long is Find Mii II? I had 300 coins and seemingly ran through half of it by buying 2 past level 7 miis, and could have gotten further if I had used that potion to call back heroes.
It took me almost 15 minutes to finish the update! Is that normal?
I have an eshop account in two regions. If I do a system transfer while set to one country, will it transfer the balance from the other region as well?
Are you saying it transfers your ambassador status as well as the games?
Wow, great guide James!
Question- Can you upload the video in 3D to youtube?
@Martyn: That doesnt make me feel safer. Even though its encrypted it still can be hacked. Guess I will just have to go out and buy eshop cards now whenever I want to download a game from now on.
can you delete pre apps like face rader, mii plaze, etc........
I really want to know if you can just transfer individual games (it makes giving gifts to siblings easier).
Wonderful update!
Golly gee dandy! Those eShop updates will be useful!
I really HATE region-locking. It's like Nintendo is telling me to screw myself just because i'm not in the USA. If this company keeps doing that, i will officialy hate it big time.
3D video recording is good enough but for 10 minutes at a time? Sweet!
@Late WHAAT? Please tell me how to do this!
Thanks for this! Nintendo really needs a list of what changes in an update, it's really stupid that one this big is like a treasure hunt to find what's new. >_>
@GreenX1 and @pntjr: Here's a link to help you out
http://www.youtube.com/watch?v=p61vcLvHK2A
I'm not sure about 3D videos as I haven't tried but at least you can get normal videos working with this guide.
I found a new feature where you can zoom out the photos you took (only photos and only ones that you took, not downloaded, graffiti or from games) if you push the circle pad down, so you can see the whole photo. Just to let you know.
@James I don't think it's about to make it clear if it is a retail or a download title, but maybe it implies there can be demos of them in the future.
sweet video recording leads to video chat.
If you can only get pink puzzle pieces from others, but nobody can buy them with play coins, how can anybody get them to begin with? The same goes for alternate puzzles. My brother and I both started out with Pilotwings Resort; do other people just start out with a different puzzle?
At #105 ( @ueI ) mine start with Donkey Kong Return... And the same question came out to me if no body can buy the pink puzzle pieces how can we get them ? And if I'm in a small city with not a lot of 3DS on "the road" how can I get them ? I've got only 2 or 3 streetpass since I've bought mine in june...
Thanks for clarifying the starting puzzle. Your answer is about what I expected. The pink pieces, unfortunately, sound like they're going to be a real pain to get ahold of.
@uel - your region setting decides that, so our streetpass group, had a number of us change to other parts of Canada to start out with different puzzles before and after switched back to where we are from. This got us Mario kart 7, The Legend of Zelda Ocarina of time 3D, Super Mario Land 3D and Donkey Kong Country Returns. We are still missing three but two more of us will soon update with places we haven't used yet to attempt to get 2 more, leaving us only missing one.
As for the pink pieces I think it mentioned spotpass as the other method to get them, but it was late so I'm not quite sure if I read that correctly.
Hey if you launch Nintendo Zone on your 3DS and click on (What is Nintendo Zone?) it'll mention playable Demo's for Retail Games.
What Find Mii 2 Combos have you all found? I found that Black/White breaks that color shield. Also Blue/Purple and Purple/Red work well together. I also have the Epona, ninja, ArwingFloral and Pirate Hats. It was cool because I had nearly 300 coins saved up since I beat Find Mii 1 a couple of months ago.
I love all of these updates! I would hope in the next updates that since we can upload mp3 music files from an SD Card to listen to in the music program that we would also be able to have a video player for playing video IPod type files.
@paburrows - my friend is far ahead of mii, he found rooms for 2 yellow and 2 dark blue
Question: In regards to playing our own video files with those requirements, can it be more than 10 mins? And if so for how long can it go up to? Also anyone recommend a video converter to get videos to those requirements? Any answers are greatly appreciated!
Nintendo Zone isn't limited to Best Buy. This includes, any place with an AT&T hotspot will reveal a ping on the app. I forgot what other hotspots were included but go to any Starbucks for a ping in that app.
Can we put videos from our computer on an sd card and watch them on the 3DS??
@espinozac7: Unfortunately, there is no official Nintendo-sanctioned method of doing so at this time. Perhaps Google can turn something up for you :3
If I buy someone else's 3DS with Ambassador Certificate, and copy it over to mine, anyone know how this affects Club Nintendo or Shop Settings? Can I change all that back to my info after the fact?
@cnm_nintendo
I think 10 minutes is the limit. I just converted a video that was around 20 minutes long and put it on my 3DS and it didn't show up. I used Format Factory to convert it. This is a free software that's surprisingly pretty good at it. You can find all the specific settings necessary to convert using this software too.
I'm hoping they'll eventually be updating maps. Especially since Australia doesn't have a map for some reason.
I don't live in Australia but I streetpassed a few people from that country while I was in Japan and while it says no map is available for Australia I apparently have 3 regions from there. I can only hope that means they intend to add in more maps later.
Hi! I don't know that anyone asked this, but if I transfer from a non-ambassador to an ambassador 3DS, the ambassador status will remain?
@supermario4ever: the way it works is that all eShop information is combined in terms of the two 3DSes, including Ambassador status and available funds. If you had Ambassador status on the 3DS you're transferring from, that Ambassador status will transfer over to the new 3DS. if you're transferring from a non-Ambassador 3DS to an Ambassador 3DS, that Ambassador status will remain as well.
@shinesprite wat is the qr code 4?
Tap here to load 119 comments
Leave A Comment
Hold on there, you need to login to post a comment...